So that etracker can determine the tracking data of the website (e.g. visitors and page views), display the survey and feedback, execute testing and targeting and record the mouse movements of visitors with UX Analytics, the etracker tracking code is required. The tracking code 4.1 needs to be included once on all of the website pages to be recorded. After this, the standard integration of the tracking code is complete and, depending on the product, your etracker account will start tracking your website or you can activate the testing and targeting, UX Analytics and the survey or feedback.
Note:
For special evaluations and reports, additional data needs to be transferred via interfaces which you must integrate into the website you wish to monitor.
The following interfaces are available for this:
- Java Script Wrapper for recording data, which should be tracked independently of a Page Impression (e.g. tracking Ajax Requests).
- eCommerce API for recording Product Performance data, orders and transferring new order status (cancellation, lead to sales).
To use all evaluation options of the individual products completely, you can also set etracker parameters for standard integration. The code setup, the standard integration and all etracker parameters are described in the following sections.
Integrating tracking code (standard integration)
The etracker tracking code is provided in the Account Info > Tracking Code menu point. So that etracker can record your website’s data, you will need to insert the etracker tracking code into the HTML source code on each page of your website or in the template of your content management system or shop system between the opening <head> tag and the closing </head> tag. The etracker code is set up as shown in the following example:
<!-- Copyright (c) 2000-2020 etracker GmbH. All rights reserved. -->
<!-- This material may not be reproduced, displayed, modified or distributed -->
<!-- without the express prior written permission of the copyright holder. -->
<!-- etracker tracklet 4.1 -->
<script type="text/javascript">
//var et_pagename = "";
//var et_areas = "";
//var et_tval = "";
//var et_tonr = "";
//var et_tsale = 0;
//var et_basket = "";
</script>
<script id="_etLoader" type="text/javascript" charset="UTF-8" data-secure-code="XXXXXX" src="//static.etracker.com/code/e.js"></script>
<!-- etracker tracklet 4.1 end -->
When you use the etracker Optimiser, we recommend integrating the tracking code directly after the opening <head> tag or as close as possible to it so that the flicker effects are minimised when calling a page. After this standard integration (without the etracker parameters), etracker will immediately start to track the website. If the URL parameters are not set for the page name, the page title will be used automatically. If the page title is not yet inserted, the URL path of the page will be used without URL parameters. Using the etracker parameters, you can individually configure the report data and use the full range of functions of etracker.
Tracking code integration with security headers
To integrate the tracking code with an enabled Content Security Policy or X-Frame Options, please ensure that the necessary header settings are applied.
Structure of the tracking code
The etracker tracking code consists of two components:
- Parameter Block: The parameter block includes all of the adjustable control parameters. These enable, among other things, the definition of individual page names, areas and order/basket details.
Note: All parameter values are to be transferred according to the URL encoding standard. Setting etracker parameters is optional.
- etracker Tracking Code: The etracker code contains the elementary number code for recording data and identifies the etracker account using the entered “Account Key 1”. Each etracker tracking code is uniquely assigned to a licensed etracker account. “Account Key 1” identifies the account whose tracking code is used at the time the data is recorded. With the code generation, the unique account key 1 is automatically inserted and may not be changed. You can find your account key under Account Info → Account Settings → Account Key.
Integrating tracking code using tag manager
Function and purpose of the tag manager
Tag managers help you to use the tracking code on different websites. They manage the tag configuration and control when the tags are triggered.
Setting up Google tag manager with etracker
Proceed as follows:
1. Register yourself with the Google Tag Manager using the email and password of your Google account: https://www.google.com/intl/de/tagmanager/
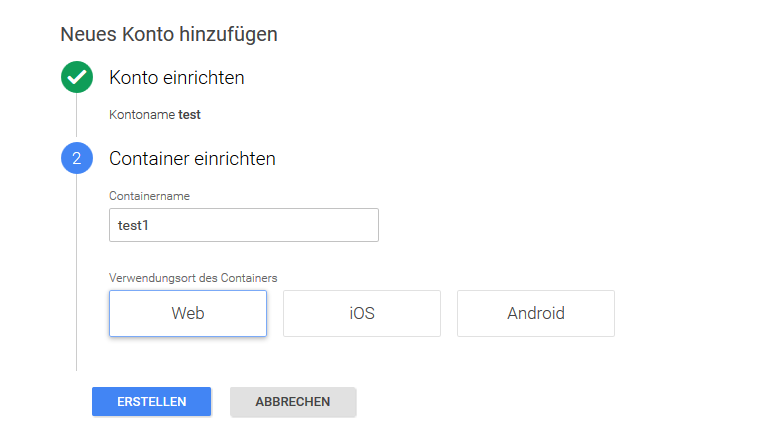
2. Set up an account for a company and select Next.

Set up a container for the company website. The container records the tags for controlling the tracking code. Then click on “Create account and container”.
3. Accept the Terms & Conditions of the Google Tag Manager. The next window shows a generated container snippet.
4. Integrate the container snippet shown in the window as displayed into every page of your website.
5. Build a data layer into your website which contains the etracker parameter values in JavaScript variables. Instructions and an explanation for this can be found, among other things, at: https://developers.google.com/tag-manager/devguide
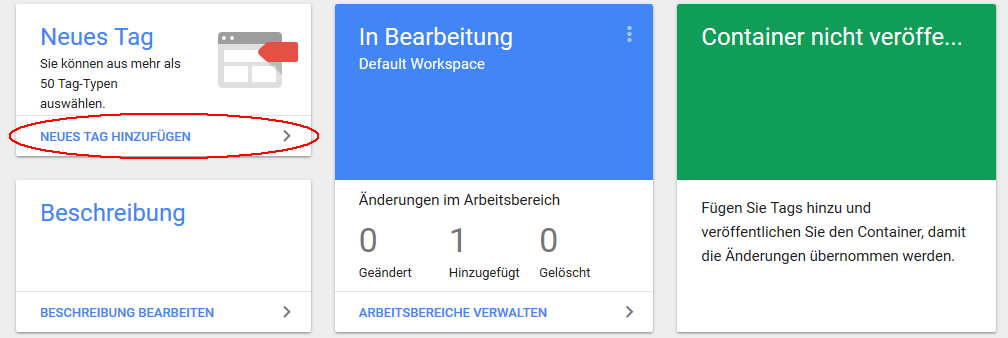
6. Click on “Add new tag”.
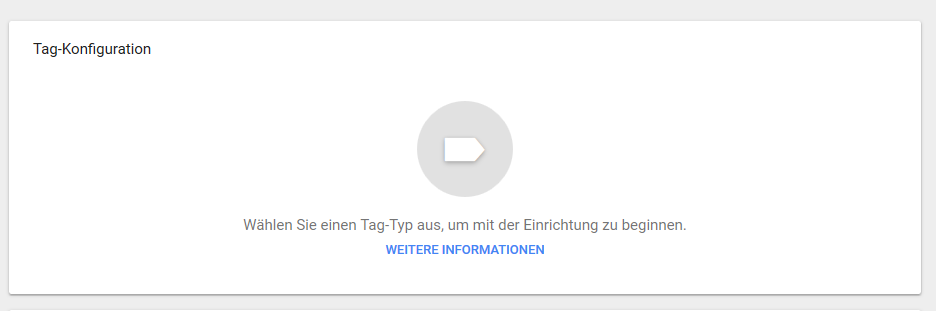
Then click on “Tag Configuration”.
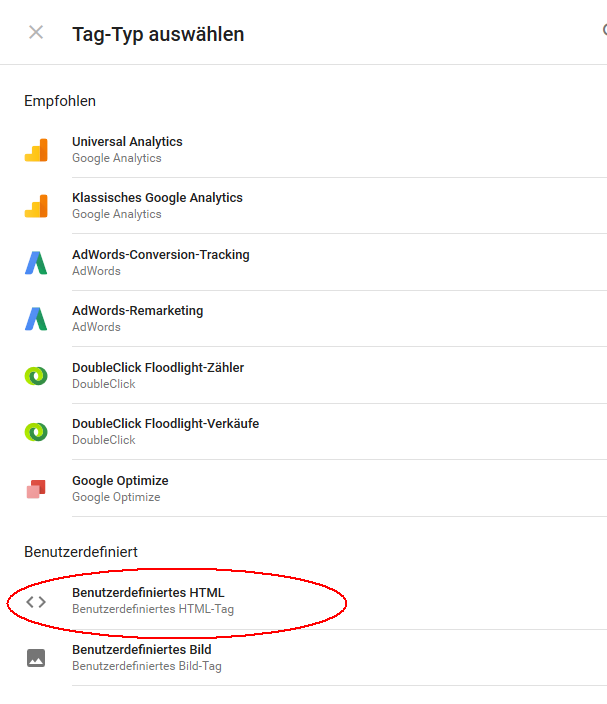
And then click on “User-defined HTML tag” in order to add a tag with your etracker tracking code to your container.
Tick the check box beside support “document.write”. To be able to generate the tag, it is now necessary to select a trigger. Cconfirm it by pressing “Save”.
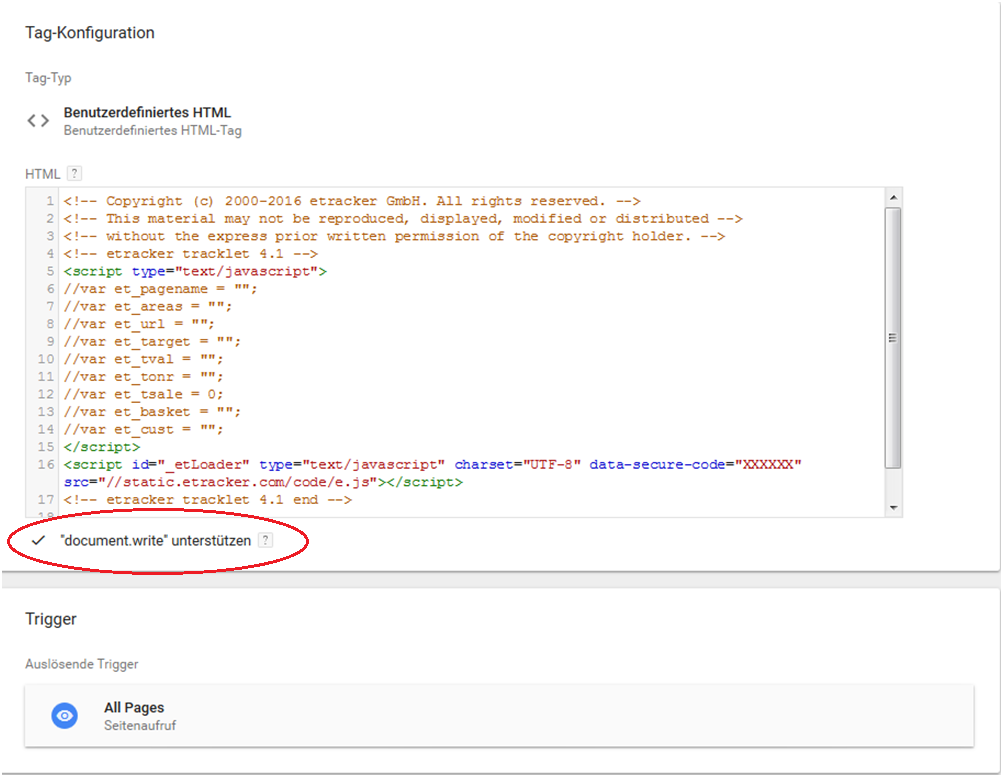
Add a trigger rule for “All pages”. Copy the tracking code from the etracker application under Settings > Setup/Tracking code, add it to the HTML window and customise it to your website by assigning the variables from your data layer to the JavaScript variables of the tracking code (see Tracking Code Integration in Websites and Portals). Finally click on “Save”.
7. Remove the old tracking code from your website and click on “Publish” in order to provide the website with the container with the tag.
Note: Please note that no data is recorded between removing the tracking code from the website and publishing the container.
Generating tracking code
To use etracker products, you will need to integrate etracker tracking code 4.1 into all of the website pages to be monitored between the opening <head> tag and the closing </head> tag. This is done as follows:
- Click on Account Info in the main menu. In the overlay, the submenu in which you can select the Tracking Code appears.
- Then follow the instructions on the screen.
In your etracker account, the etracker code for simple standard integration is provided. In addition, you can individually configure your etracker reports by setting the etracker parameters.
Integrating tracking code (PHP, JSP, Flash, Frames, CMS)
How do I integrate the tracking code into PHP websites?
Use this PHP code:
<?php
/* Sample usage: */
require_once "etracker.inc.php";
// easy base code (pagename will be detected automatically)
echo etracker::getCode("YOUR_SECURECODE");
// normal base code
echo etracker::getCode("YOUR_SECURECODE", array('et_pagename' => "YOUR_PAGENAME", 'et_areas' => "YOUR_AREA1/AREA2"));
// base code for campaign / target pages
echo etracker::getCode(
 "YOUR_SECURECODE",
 array(
 'et_pagename' => 'YOUR_PAGENAME', // pagename
 'et_areas' => 'YOUR_AREA1/AREA2', // slash delimited area names
 'et_tval' => 5.80, // target value
 'et_tsale' => 1, // target is sale (1) not a lead (0)
 'et_tonr' => 'YOUR_INV_NR:123', // target order number
 'et_basket' => 'ARTICLE1,DESCRIPTION1,GROUP1,AMOUNT1,PRICE1' // shopping cart
 ),
 true
);
?>
Download the file etracker.inc.php.zip here.
How do I integrate the tracking code into JSP websites?
<!-- etracker Bean instance -->
<jsp:useBean id="etracker" scope="session" class="com.etracker.bean.Bean"/>
<!-- easy code with default settings (pagename will be detected automatically) -->
<%=etracker.getCode("YOUR_SECURECODE")%>
<!-- code with some parameters set -->
<%
 List<CountingParameter> parameters = new ArrayList<CountingParameter>();
 parameters.add(etracker.newParam(etracker.Parameter.PAGE_NAME, "my new page name"));
 parameters.add(etracker.newParam(etracker.Parameter.LPAGE, 3));
%>
<%=etracker.getCode("YOUR_SECURECODE", parameters)%>
<!-- code with parameters set and options set
 (output noscript part, not a free account, show all parameter in javascript) -->
<%=etracker.getCode("YOUR_SECURECODE", parameters, true, false, true)%>
Download the file etracker-bean.jar (version 4.0) here.
How do I integrate the tracking code into Flash websites?
To integrate the etracker tracking code into Flash websites, you can find examples in the following ActionScript 2.0 and ActionScript 3.0 for triggering etracker counting from Flash. Use the ExternalInterface.call method to call the etracker function et_eC_Wrapper from within Flash.
Examples:
ExternalInterface.call("et_eC_Wrapper", "Key", "Pagename", "Area");
ExternalInterface.call("et_eC_Wrapper", "Key", "Pagename", "Area",
 "ilevel", "URL", "Target", "tval", "Ordernr",
 "tsale", "Customer", "Basket";
How do I integrate the tracking code when using frames?
Usually a frameset consists of multiple small frames, e.g. with menus, copyright notices and titles as well as a large main frame in which the actual content is shown. If the visitor selects a menu point, the content of the main frame will be changed. When counting page impressions it is important to know which pages are viewed by visitors in this main frame. To correctly count the page impressions, the etracker tracking code may only be inserted on those pages of the frameset which will be loaded later in the main frame.
How do I integrate the tracking code into content management systems and shop systems?
For content management / shop systems like, for example, Typo3 or Oxid, the etracker tracking code should be generated once manually and then inserted into the layout template. The parameters of the etracker tracking code are then to be transferred using content management / shop system variables.