You want to control your Microsoft Ads campaigns with etracker data? This is no problem with the Conversion Upload. The only requirement is that you have implemented Microsoft Ads tracking.
The automatic upload of conversion data to Microsoft Ads enables you to
- see the conversion rates and sales of your campaigns directly in Microsoft Ads, so that you can control and analyze campaigns completely in Microsoft Ads.
- use conversions for automated bid optimization like maximize closes and target CPA.
The upload setting is required only once and can be set up in just three steps:
1. Set up the conversion upload settings in etracker analytics
You can access the conversion upload settings under Marketing Reports by clicking on the magic wand next to Paid Media:
After filling the Suffix field of the final URL at the account level with the appropriate parameters, the following conversion upload settings can be made:
- setting the interval for the upload
- selection of the attribution model for the assignment of the conversion data
- selection of the submitted conversion actions
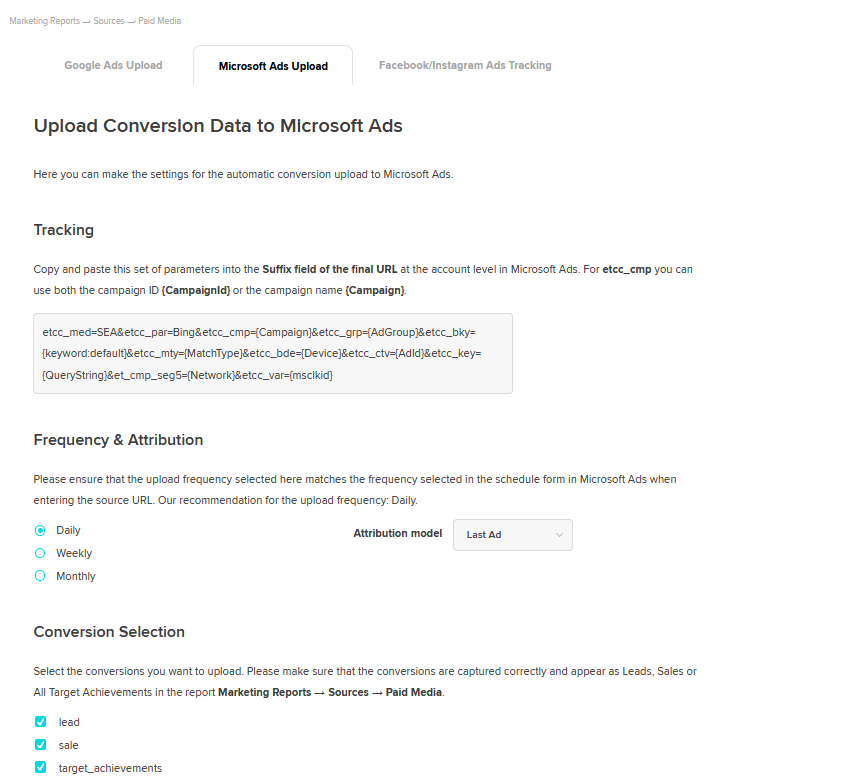
A daily upload loads the data of the last two days (yesterday and the day before yesterday) into Microsoft Ads, a weekly upload loads the data of the last fourteen days (yesterday, the day before yesterday, …).
Attention! The upload frequency selected here must match the frequency set later in Microsoft Advertising!
2. Set up the conversion upload in Microsoft Advertising
To do this, log in to Microsoft Advertising and then click Tools → Offline Deals in the menu bar:
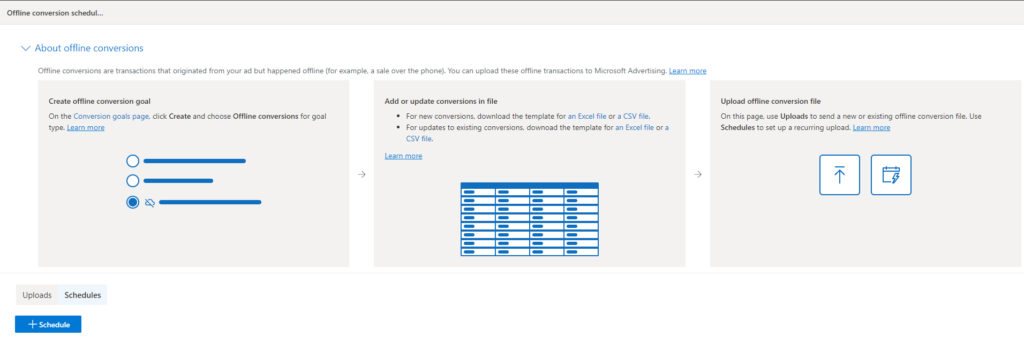
For scheduled uploads, click on Schedules and set up a new schedule:
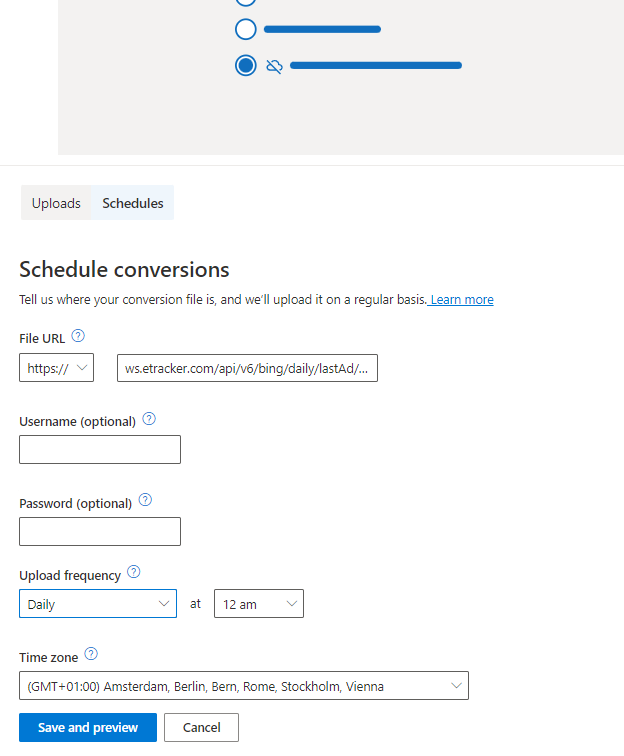
Select HTTPS as the source and paste the source URL created in the Upload settings in etracker Analytics into the File URL field.
This ensures that only Microsoft Advertising can fetch the data. The source URL can be renewed at any time in etracker Analytics, but must then be entered again at Microsoft Advertising.
Finally, set the frequency and time, then click Save and Preview to save the schedule. Microsoft Advertising loads the data for the first time, displays a preview and starts the automatic upload.
Attention. The frequency of the upload in Microsoft Advertising must match the frequency chosen when generating the source URL.
To ensure that all conversions from the previous day have been processed, we recommend setting the upload time to12:00.
3. Set up conversion goals in Microsoft Advertising
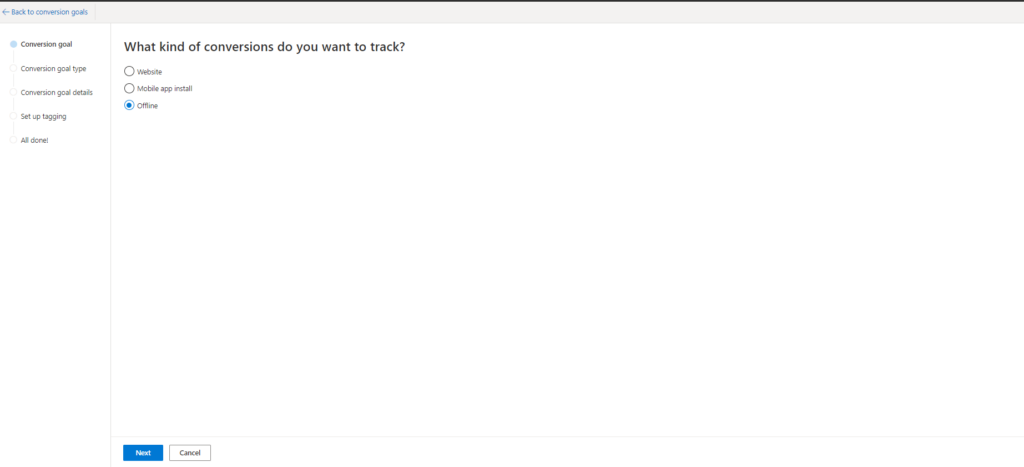
The last step is to create conversion actions or coversion goals in Microsoft Advertising. To do this, go to Tools → Conversion goals and click +Create.
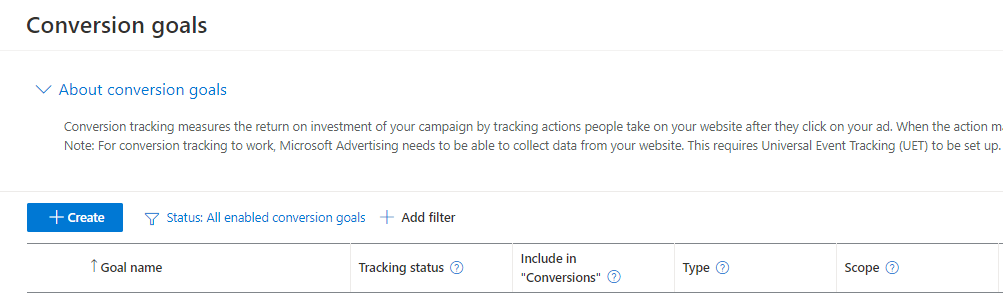
Set Offline in the next step.
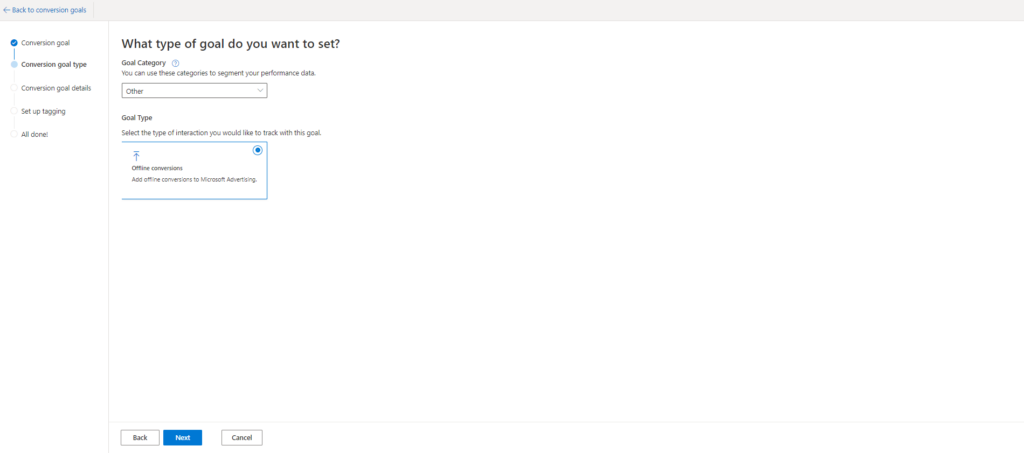
In the next step, select the appropriate Goal Category and select Offline conversions under Goal Type.
After that, enter lead, sale and target_achievement as name one after the other. Please make sure to use only these action names in exactly the same spelling. Select Conversion action value may vary and complete the creation of the conversion goal.
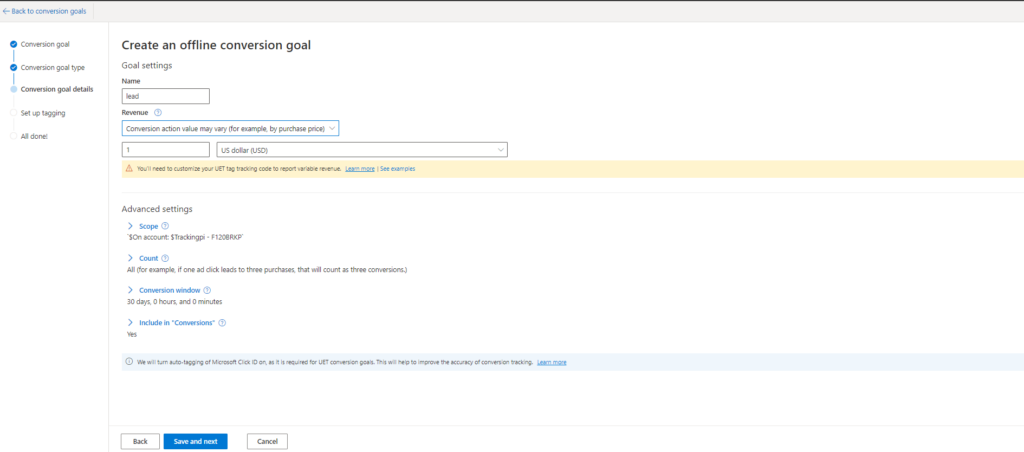
Finally, complete the following steps for each of the three conversion actions (lead, sale, target_achievement), filling in the other fields as instructed.
After creating all the final targets to be considered, the conversion upload setup is complete.