Easy creation of reports from etracker Analytics data in Looker Studio
Looker Studio enables the creation of reports with data visualisations that can be shared within the organisation, with external partners or customers. In conjunction with the etracker Connector, instant cloud-to-cloud access to all etracker Analytics data is possible – without manual uploading or scripting, just plug & play.
The main functions in Looker Studio are:
- Data combination and aggregation
- Reporting and dashboarding
- Data visualisations
- Collaboration and access rights
We show below how easy it ort create reports from etracker Analytics data in Looker Studio.
The etracker Connector requires an etracker Analytics Enterprise Edition. To use it, you need an access token ort he etracker report interface (REST Report API). You can create this as an administrator/(main) user in the etracker account under Settings → Account → Integrations.
Connection to etracker Analytics from Looker Studio
Looker Studio uses a direct point-and-click interface to connect to data sources. Follow these steps.
1. Log into Looker Studio using this address: https://datastudio.google.com/.
2. Click Create from the left-hand menu and select Data source.
3. Enter etracker into search and select etracker Connector from the available data sources.
4. Click on Authorise and allow the etracker application via Google authentication.
5. Select Current Api Access as “Auth Type”. The legacy method is still supported, but no longer recommended.
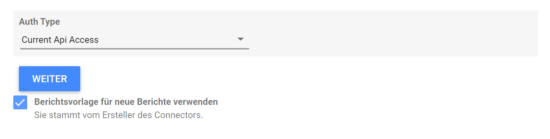
6. Enter your access token for the etracker REST Report API.
7. Select a report and use the etracker report template if required.
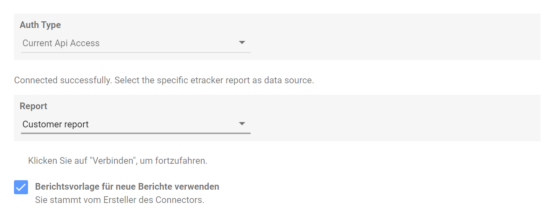
8. Click on Connect in the top right-hand corner to activate the connector.
Reporting in Looker Studio
Once the connector is activated, you can edit the imported attributes and metrics. There are several options available: renaming, deletition, choosing data type, aggregation, change description, field addition, etc.
You can also configure the general options of the dashboard, such as the timeliness of the data, the activation of the visualisations created by the community or the possibility to edit a field directly in the report.
After the setup, click on Create report in the top right corner to start creating a report or dashboard.
If you want to add data from different sources or additional etracker accounts, click on Add data in the menu.

Select the etracker connector from the available data sources. Enter the access token for the additional etracker account and select the desired etracker report as data source.
Help for the use and operation of the Looker Studio is available here.