Das E-Mail Reporting ermöglicht den automatisierten Versand von einzelnen Reports oder individuell zusammengestellter Report-Sets per E-Mail. So können Kunden, Vorgesetzte, Kollegen oder Agentur-Partner regelmäßig mit den für sie relevanten Informationen versorgt werden, ohne sich in die Applikation einloggen zu müssen. Per Knopfdruck sind die ausgewählten Report-Sets zusätzlich jederzeit zum Download abrufbar.
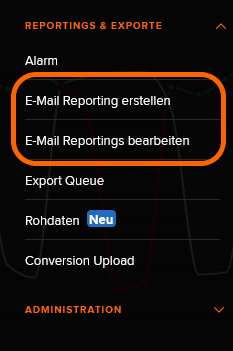
Eine Übersicht über alle E-Mail Reportings und die Reporting-Konfiguration befinden sich unter Einstellungen → Reportings & Exporte.
Reporting erstellen
Gehe zu Einstellungen → Reportings & Exporte → E-Mail Reporting erstellen
Der Erstellungsprozess umfasst folgende Schritte:
1. Auswahl des Typs (Dateiformats) und Titels
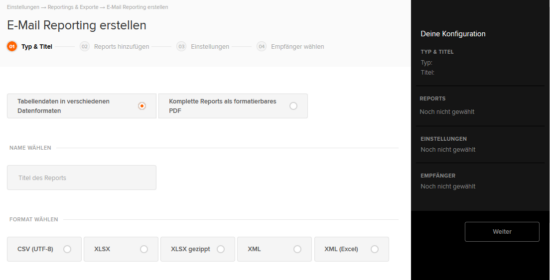
2. Auswahl der beinhalteten Reports
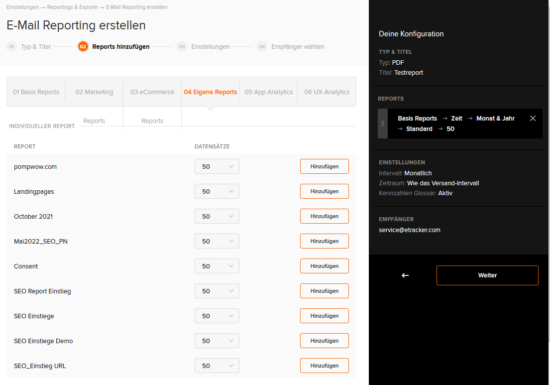
Einzelne E-Mails für jeden Report sind unpraktisch und nervig. Daher gibt es die Möglichkeit, mehrere Reports in unterschiedlichen Konfigurationen in einem Reporting zu kombinieren und gesammelt in einer Datei zu versenden. In Excel findest du die unterschiedlichen Reports als einzelne Tabs wieder. Es können Reports aus allen Web-, App- und UX Analytics-Bereichen ausgewählt werden. Zusätzlich können verschiedene Konfigurationen der Reports, d.h. mit individueller Segmentierung, Sortierung, Filterung und Kennzahlauswahl, in den jeweiligen Reports gespeichert und im Reporting verwendet werden. Die Anzahl der Datensätze für den Reportversand lässt sich ebenfalls einstellen, wenn bspw. nur die Top 50 Keywords, Seiten oder Bereiche betrachten werden sollen.
Bitte beachte:
Im PDF-Format ist die Ausgabebreite begrenzt. Daher müssen Konfigurationen erstellt und ausgewählt werden, die von der Kennzahl-Auswahl begrenzt sind. Das Warnschild gibt an, wenn Konfigurationen zu umfangreich für PDFs sind.
3. Auswahl des Versandintervalls

Lege fest, ob der Reportversand täglich, wöchentlich, monatlich, quartalsweise oder jährlich erfolgen und welcher Zeitraum des Reportings genutzt werden soll.
4. Empfänger wählen
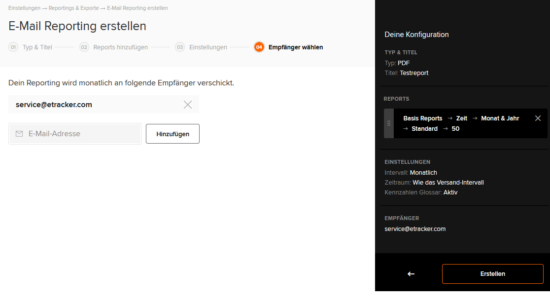
Jetzt fehlt nur noch die Angabe der Empfänger, um die Reporting-Konfiguration abzuschließen. Mit Klick auf Erstellen wird der Reportversand aktiviert.
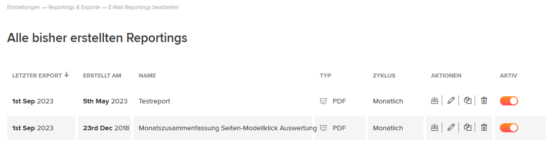
Reportingübersicht
Über Einstellungen → Reportings & Exporte → E-Mail Reportings bearbeiten gelangst du zur Übersicht aller erstellten Reportings mit jeweiligem Erstellungsdatum, Namen und Versandintervall. Durch Klick auf die Icons in der Spalte Aktionen können die Reportings als Datei zum Download abgerufen, geändert oder gelöscht werden.